An industrial LED driver rarely fails on a tidy schedule. Heat builds inside a sealed fixture, dust coats the fins, and voltage fluctuations test components during long shifts. The question “what is the lifespan of an industrial led driver” has no single answer. Many products are rated for tens of thousands of hours, but those figures depend on test conditions, operating temperature, and component quality. A rating is a useful clue, not a promise.
Lighting researcher Dr. Nadarajah Narendran’s work examines LED systems as more than isolated light sources. The following is an editorial paraphrase, not a verbatim quotation: “An LED installation’s service life depends on the conditions around every component, not the LED chip alone.” That perspective matters. The driver’s capacitors, solder joints, enclosure, and thermal path can each shape its real-world life. A small temperature rise, repeated daily, may matter more than a dramatic one-time stress.
This guide explores practical ways to extend driver life: match the driver to the load, provide clear airflow, keep moisture and contaminants away, and inspect connections during scheduled maintenance. Look closely at the fixture’s hottest area. Record temperature and failures, rather than relying on memory. Simple habits help.
Still, not every failure is preventable. A driver can be correctly installed and fail early; that deserves investigation, not excuses. Product datasheets rarely capture every factory condition. Use ratings alongside installation details, measured temperatures, and warranty terms to make a grounded decision.
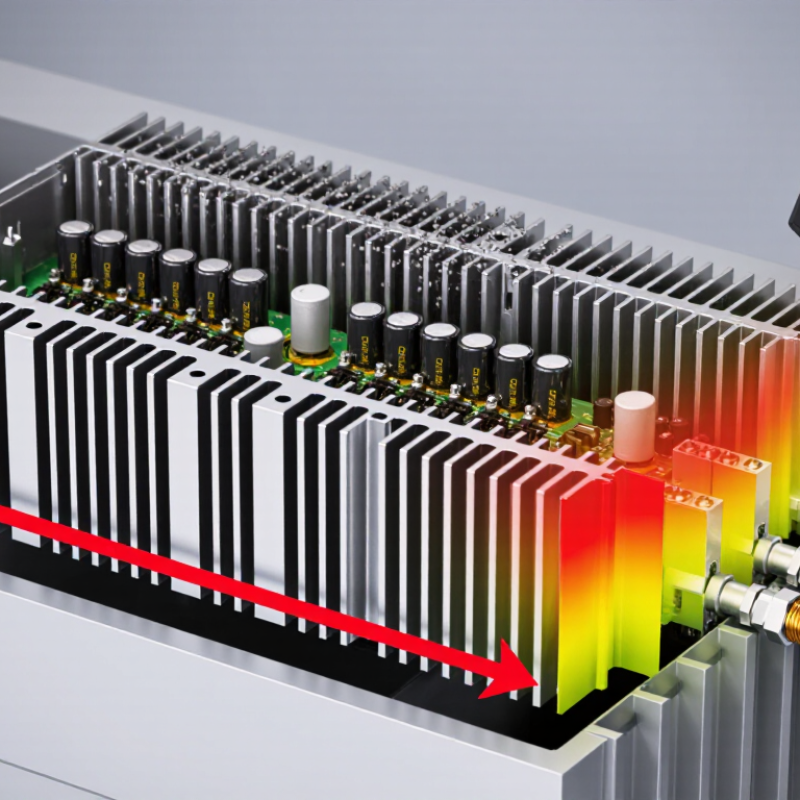
Before installing an industrial LED driver, compare its datasheet limits with the actual electrical conditions. Check the input-voltage range, frequency, output current, and permitted load. Measure voltage at the driver during startup and under full load; a nominally correct supply can still sag or spike. Confirm the driver’s surge rating against the site’s exposure, especially near motors or long cable runs. Small margins matter.
Temperature deserves equal attention. Find the marked case-temperature point, often labeled Tc, and measure it after the fixture has run in its real enclosure. A hot metal ceiling, sealed housing, or dusty heat sink can push that point beyond its rated limit. The U.S. Department of Energy’s report, LED Luminaire Lifetime: Recommendations for Testing and Reporting, explains that LM-80 tests LED packages, modules, or arrays—not the complete driver. Its referenced testing period is at least 6,000 hours, with 10,000 hours recommended. LED test results alone therefore cannot establish driver life. Heat wins. Check ambient temperature, humidity, vibration, and ventilation too; one overlooked condition can undo an otherwise careful rating check. And yes, a generous-looking datasheet range can still leave little room for a poorly ventilated fixture.
| Limit or Parameter | What to Check | Practical Specification Guidance | Action to Help Extend Driver Life |
|---|---|---|---|
| AC input voltage and frequency | Verify the driver’s rated input range and the supply voltage at the driver under normal and abnormal site conditions. | Input ranges are model-specific. A driver marked 100–277 V AC, for example, must be operated within that stated range and at its specified frequency. | Choose a driver rated for the actual supply, including expected voltage variation. Investigate repeated undervoltage, overvoltage, or unstable supply conditions. |
| Output current | Confirm the LED module’s required current and the driver’s rated output current. | Constant-current drivers regulate current within their specified operating range. The LED load must be compatible with the driver’s current rating. | Do not exceed the LED module’s current rating or use an unapproved current setting. Verify the setting before commissioning. |
| Output voltage and load range | Check that the LED string’s forward-voltage range at the intended current falls inside the driver’s rated output-voltage window. | The output voltage depends on the connected LED load. A constant-current driver must operate within both its output-voltage range and its rated power. | Calculate the LED string’s voltage over expected operating conditions, then confirm compatibility with the driver datasheet. Avoid open-circuit or out-of-range operation unless permitted. |
| Output power | Compare the LED load’s electrical power with the driver’s rated output power. | Both output current and output voltage determine delivered power. The driver must not be operated beyond its specified maximum rating. | Allow for the LED load’s real operating conditions and follow any load or power derating instructions in the datasheet. |
| Ambient operating temperature | Measure the air temperature around the installed driver, not just the room temperature. | Operating-temperature limits vary by model. A range such as −20°C to +60°C is an example only; the actual rated range and any derating curve govern. | Keep the driver within its specified temperature range. Improve spacing, airflow, or enclosure design if the local ambient temperature is high. |
| Case temperature (Tc) | Locate the manufacturer’s Tc measurement point and measure it with the driver operating at the intended load. | The maximum permitted Tc is model-specific and is commonly stated on the driver label or datasheet. It is not interchangeable with ambient temperature. | Keep measured Tc below the specified maximum, with a reasonable margin. Recheck it after installation and when enclosure or load conditions change. |
| Thermal derating | Review output-power or output-current derating curves against ambient temperature and installation conditions. | Some drivers reduce allowable output as temperature rises. The shape and starting point of the derating curve vary by product. | Do not assume full rated output at every temperature. Size the driver and LED load using the applicable derating curve. |
| Humidity and condensation | Check the rated relative humidity and whether the site may experience condensation or rapid temperature changes. | Humidity ratings are product-specific and often distinguish non-condensing conditions from wet or condensing environments. | Prevent moisture from accumulating on the driver or its terminals. Use an enclosure and installation method suitable for the site conditions. |
| Ingress protection (IP rating) | Match the driver’s IP rating to exposure to dust, water, and cleaning processes. | An IP rating describes protection under specified test conditions; it does not by itself establish suitability for every outdoor, corrosive, or washdown application. | Select a rating appropriate to the installation and maintain cable entries, seals, and covers as specified. |
| Surge and transient exposure | Review the driver’s surge-immunity rating and the electrical environment, including switching loads and lightning exposure. | Surge ratings and test configurations differ between products. Use the rating and installation requirements stated in the datasheet. | Use suitable upstream surge protection and grounding where required by the installation design and local electrical rules. |
| Power factor and harmonic limits | Check power factor and total harmonic distortion requirements for the supply system or project. | These are performance and compatibility specifications, not direct service-life guarantees. Values vary with driver model and operating load. | Choose a driver that meets the application’s electrical requirements and operate it within the load conditions used for its published ratings. |
| Altitude and cooling conditions | Check any altitude limits and account for reduced cooling in enclosed or poorly ventilated locations. | Some products specify an altitude limit or require derating above a stated elevation. Requirements are manufacturer-specific. | Follow altitude and mounting instructions, and verify operating temperatures in the final installation. |
Important: Numerical limits are product-specific. The examples above are general selection guidance, not universal ratings. Always follow the exact driver datasheet, label, installation instructions, and applicable electrical codes.
Keep it away from hot exhausts. Leave open space around the case. Measure temperature at the driver, not only in the room.
No. It may keep moisture out but trap heat inside. Check temperatures while the equipment is running.
Warm, humid air can cool on circuit boards and form moisture. Avoid leak-prone spots and places where condensation collects.
Match protection to the actual exposure. IP6X indicates dust-tight protection; IPX5 covers water jets. A stronger-sounding label is not always necessary.
It can loosen terminals and strain solder joints over time. Mount the driver on a rigid surface, and support cables near their entry points.
Check for dust, moisture, corrosion, loose wiring, damaged seals, and darkened terminal areas. Faint buzzing or flicker can be clues, but they do not identify the cause.
Isolate power and follow site procedures. Let the unit cool. Use a dry, lint-free cloth for surface dust, and do not open a sealed unit unless qualified.
Set intervals based on the environment and equipment instructions. Hot, dusty, or damp locations may need closer checks. Record dates, operating conditions, and unusual noise or heat.
No. A clean-looking unit can still fail. Inspections help reveal patterns, but they do not replace suitable installation or professional testing.
Maximizing the lifespan of an industrial LED driver begins with understanding its electrical ratings and environmental limits. Select a driver that matches the LED load, voltage, current, and power requirements, and avoid operating it beyond its specified capacity. If you are asking, “what is the lifespan of an industrial led driver,” the answer depends greatly on how well it is matched, installed, and protected throughout its service life.
Heat, moisture, dust, and vibration can all accelerate wear, so provide suitable ventilation and protection for the installation environment. Follow the driver’s rated operating conditions, use secure connections, and avoid excessive electrical or thermal stress. Regularly inspect the driver for signs of damage, loose wiring, overheating, or unusual performance, and address issues promptly. Careful selection, proper installation, and consistent maintenance help support reliable operation and extend the driver’s useful life.

 Habel Lighting