7 Tips on How to Ground an Outdoor LED Light Fixture?

Time:2026-10-20 Author:Amelia
0%

Outdoor LED fixtures brighten driveways, gardens, walkways, and commercial entrances. However, brightness does not equal electrical safety. A loose grounding connection can leave a metal housing energized after insulation fails. That danger may remain invisible until someone touches the fixture during rain.

The U.S. Department of Energy’s 2019 Energy Savings Forecast for Solid-State Lighting projected LED technology could achieve about 86% penetration in general illumination by 2035. More installations also mean more grounding decisions. The National Electrical Code, including Article 250 and relevant outdoor wiring requirements, treats grounding and bonding as essential protection. NEMA standards, such as ANSI C136.10 for outdoor lighting equipment, also emphasize safe equipment construction and electrical continuity.

This guide explains how to ground an outdoor led light fixture with practical, inspection-minded steps. It covers identifying the grounding conductor, checking the fixture’s grounding terminal, bonding metal parts, and testing the completed connection. Small details matter. Green or bare copper wires should not be assumed safe without verification. A corroded screw, painted contact surface, or undersized connector can defeat an otherwise careful installation.

Real projects are rarely perfect. Existing wiring may be mislabeled. Older fixtures may lack a reliable grounding path. That uncertainty deserves attention, not guesswork. A qualified electrician should confirm local code requirements, circuit isolation, weatherproof connections, and grounding continuity before energizing the fixture. Use this article as a field reference, not a replacement for professional inspection.
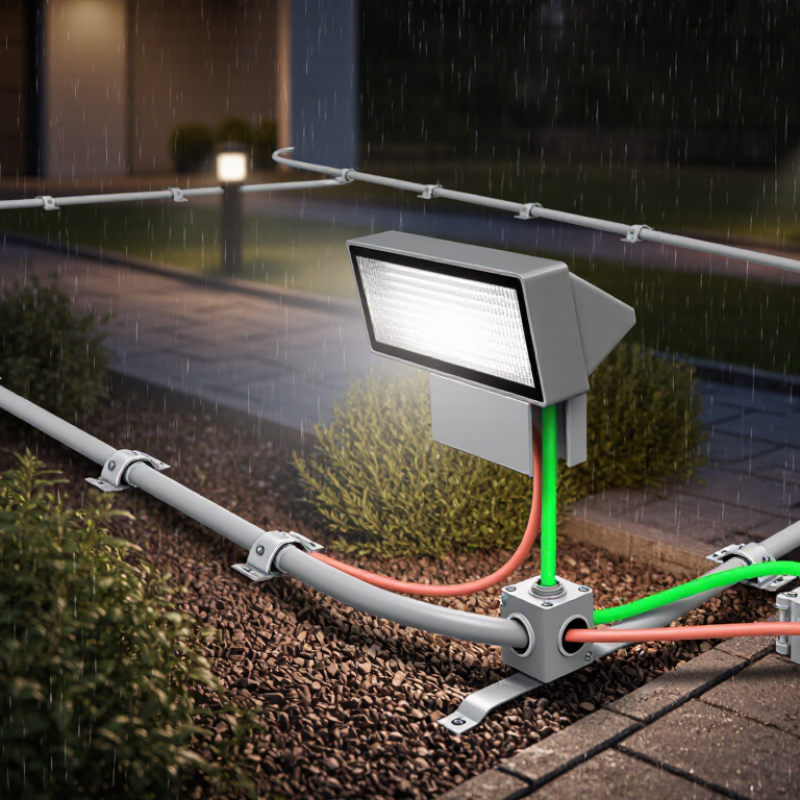
7 Tips on How to Ground an Outdoor LED Light Fixture?

Understanding Grounding Requirements for Outdoor LED Light Fixtures

Outdoor LED fixtures face rain, condensation, soil moisture, and accidental cable damage.

Proper grounding reduces shock risks and gives fault current a safer path.

Requirements vary by location, voltage, and fixture construction. Check local electrical codes before touching the wiring.

Tip 1

Turn off the circuit at the breaker, then verify it with a reliable tester.

Tip 2

Identify the fixture’s grounding terminal or green conductor.

Tip 3

Connect it to the building’s protective grounding conductor, never to a random metal pipe.

Metal mounting boxes also need bonding when required. Keep connections tight.

4
Tip 4

Use outdoor-rated junction boxes, connectors, and cable entries.

Tip 5

Seal openings without trapping water inside the fixture.

Tip 6

Protect buried cables at the required depth and use suitable conduit.

Tip 7

Test continuity from the fixture to the grounding point before restoring power.

A GFCI or RCD may provide additional protection, but it does not replace grounding.

Double-insulated fixtures may follow different rules, so read their installation instructions carefully.

I still recheck every connection after testing; a clean-looking terminal can hide corrosion or a loose strand.

When the grounding path is unclear, stop and ask a licensed electrician.

Some installations appear simple. They are not.

Gathering Tools and Inspecting the Fixture and Wiring

Gathering tools is the first practical step when grounding an outdoor LED light fixture. Prepare a voltage tester, multimeter, insulated screwdrivers, wire strippers, a torque screwdriver, a small wire brush, and a flashlight. Use eye protection and voltage-rated gloves. Turn off the correct circuit breaker, then verify the circuit is dead with a tester and meter. Do not trust the wall switch alone.

Inspect the fixture before touching its wiring. Look for cracked insulation, water marks, green corrosion, loose screws, damaged gaskets, and missing grounding hardware. Confirm that the fixture’s grounding terminal connects to the bare or green equipment grounding conductor. The grounding wire must not be treated as a neutral wire. Check the junction box, cable entry, and strain relief too. Outdoor moisture often enters through small gaps.

NFPA’s Home Structure Fires Involving Electrical Distribution and Lighting Equipment report recorded about 35,150 fires annually from 2012 to 2016, causing 470 civilian deaths and roughly $1.3 billion in property damage. That data makes a slow inspection worthwhile. A non-contact tester can give false confidence, so a meter is better for confirmation. Even experienced installers sometimes miss corrosion beneath a terminal washer. If the grounding path is unclear, stop and contact a qualified electrician. Never energize a fixture with exposed conductors or an uncertain connection.

7 Tips on How to Ground an Outdoor LED Light Fixture? — Gathering Tools and Inspecting the Fixture and Wiring
Step Grounding Tip Tools and Materials Inspection or Work to Perform Acceptable Condition Risk Level
1 Turn off and verify the circuit is de-energized
  • Non-contact voltage tester
  • Two-pole voltage tester
  • Lockout or warning tag
Switch off the correct circuit breaker. Prevent others from restoring power, then test the supply conductors before touching the wiring. The tester indicates no voltage between line, neutral, and equipment-grounding conductors. Do not rely on the wall switch alone. High
2 Gather tools and use outdoor-rated materials
  • Screwdrivers and nut drivers
  • Wire stripper and insulated pliers
  • Approved wire connectors
  • Outdoor-rated cable fittings
  • Wire brush and electrical tape
Confirm that connectors, boxes, fittings, and replacement parts are suitable for wet or damp locations as required by the installation. Materials are undamaged, compatible with the conductor size, and marked or listed for the intended outdoor location. Medium
3 Inspect the fixture body and grounding point
  • Flashlight
  • Small inspection mirror
  • Screwdriver
Look for a green grounding screw, grounding terminal, or grounding lead. Examine the housing, mounting bracket, threaded parts, and junction-box cover for corrosion or damage. The grounding point is secure, clean, mechanically sound, and electrically bonded to exposed conductive metal parts. Medium
4 Identify the conductors before making connections
  • Voltage tester
  • Wire labels or marker
  • Wiring diagram supplied with the fixture
Distinguish the line, neutral, and equipment-grounding conductors by the installation markings and the fixture instructions. Never use the neutral as a substitute for equipment grounding. Each conductor is correctly identified, clearly marked when needed, and matched to the fixture's wiring diagram. High
5 Connect the equipment-grounding conductor securely
  • Approved grounding screw or connector
  • Wire stripper
  • Torque screwdriver, when specified
Attach the supply grounding conductor to the fixture grounding lead or grounding terminal. Bond the metal junction box and mounting hardware when required by the wiring method. The grounding connection is tight, protected from accidental contact, and free of paint, rust, loose strands, or insulation under the terminal. High
6 Protect the wiring from moisture and mechanical damage
  • Weatherproof box cover or gasket
  • Listed cable gland or conduit fitting
  • Approved wire connectors
  • Silicone sealant only where permitted
Inspect cable entry points, conduit fittings, box covers, and wire connectors. Ensure cables are supported and do not rub against sharp metal edges. The enclosure remains weather-resistant, fittings are tight, drain or sealing provisions are not blocked, and no copper is exposed outside connectors. Medium
7 Test the completed installation before normal use
  • Two-pole voltage tester
  • Continuity tester or multimeter
  • Ground-fault protection test button, if present
Reinstall covers, restore power, test the light, and verify that the protective device operates correctly. If grounding continuity or voltage readings are abnormal, switch off the circuit and obtain qualified electrical help. The fixture operates normally, there is no visible arcing or overheating, the enclosure is secure, and protective devices do not trip unexpectedly. High
Safety note: Electrical requirements vary by location and installation type. Follow the fixture instructions and applicable electrical codes. If the grounding conductor is missing, damaged, or difficult to identify, stop work and contact a qualified electrician.

Turning Off Power and Preparing a Safe Installation Area

7 Tips on How to Ground an Outdoor LED Light Fixture
Turning off power is the first safety task, not a minor preparation. Switch off the correct circuit at the breaker panel, then turn off the wall switch. Do not trust the switch alone. Test every wire with a properly working voltage tester. Test the tester before and after checking the circuit. A dark fixture does not prove the wires are safe. If the breaker is not clearly labeled, stop and identify it with help from a qualified electrician.
Tip 1:
Keep the work area dry and bright. Remove wet leaves, loose tools, and standing water near the ladder. Inspect the junction box for cracks, corrosion, or loose mounting screws. Use stable footing, and keep the ladder away from overhead conductors.
Tip 2:
Read the fixture instructions before touching the grounding wire. The bare or green conductor usually connects to the fixture’s grounding screw and the grounded box, when present. Never use the neutral wire as a substitute. Local electrical codes may require additional protection, such as a GFCI device.
Tip 3:
Prepare the connection before lifting the fixture. Cap unused wires securely, protect cable entries, and keep seals correctly positioned. Outdoor moisture can enter through one careless opening. I sometimes recheck each connection because rushing creates avoidable mistakes. It feels repetitive. That is useful. If the box or wiring looks damaged, pause and arrange a professional inspection before restoring power. After installation, switch the breaker on carefully and test the light from a dry position.

Connecting the Ground Wire Through Seven Essential Steps

7 Tips on How to Ground an Outdoor LED Light Fixture?

Connecting the Ground Wire Through Seven Essential Steps

Turn off the breaker before touching the fixture. Verify zero voltage with a properly rated tester. Inspect the cable, fixture, and junction box for damage. Find the bare copper or green insulated grounding conductor. Connect it to the fixture’s green grounding screw. Join it to the supply grounding conductor with an approved connector. Bond a metal box or grounding conduit when required. Tighten every connection firmly, then perform a gentle tug test. Restore the cover and test the circuit’s GFCI protection.

Never treat the neutral wire as a grounding path. It is not the same.

NFPA Research reports about 32,000 U.S. home fires annually involved electrical distribution or lighting equipment during 2016–2020. Those fires caused roughly 470 civilian deaths. The figures show why a small grounding error deserves attention.

Outdoor moisture makes weak connections worse. Keep the grounding point clean, dry, and free from paint. Use outdoor-rated fittings and follow the fixture instructions. Local electrical rules may require a qualified electrician.

I have seen tidy installations hide loose ground screws. That mistake is easy to miss. Recheck the connection before closing the box. A second inspection may feel excessive, but it can reveal corrosion, a pinched wire, or an unsuitable connector.

Testing the Grounding Connection and Maintaining the Fixture

Grounding an outdoor LED light fixture is not a box-checking exercise. Moisture, damaged insulation, and loose terminals can turn a metal housing into a shock hazard. NFPA reports that electrical distribution and lighting equipment caused an average of 32,620 U.S. home fires annually from 2016 to 2020. The report also recorded about 470 deaths and 1,100 injuries each year.

Testing starts with safety. Switch off the circuit, lock the disconnect, and verify the absence of voltage with a rated tester. Inspect the green or bare grounding conductor for cuts, oxidation, or loose strands. Use a continuity tester or low-resistance meter between the fixture’s grounding terminal and the circuit grounding conductor. The reading should remain stable when the cable is gently moved. A beep alone is not proof of a dependable connection.

That detail matters.

For metal fixtures, test continuity to the housing and mounting bracket. Do not use a painted surface as the contact point. Remove corrosion carefully, then tighten terminals according to the manufacturer’s specified torque. Outdoor electrical installations should also receive ground-fault protection, with devices tested regularly under applicable electrical codes. NFPA 70 requires grounding and bonding methods that provide a permanent, effective fault-current path.

Maintenance should include checking cracked seals, water stains, rust, and loose mounting hardware after severe weather. Clean the lens with a soft, damp cloth, not abrasive chemicals. I have seen otherwise sound fixtures fail because water entered through a hardened gasket. One imperfect habit remains common: testing only after a problem appears. Scheduled inspections are safer, especially in coastal, wet, or dusty locations.

FAQS

Why is grounding important for an outdoor LED light fixture?

Grounding gives fault current a safer path away from people. Rain, condensation, and damaged insulation increase shock risks. Moisture changes everything.

How should I prepare before checking the grounding connection?

Turn off the circuit at the breaker. Lock the disconnect if possible. Verify no voltage with a properly rated tester.

Where should the fixture’s grounding conductor connect?

Connect the green or bare conductor to the building’s protective grounding conductor. Never connect it to a random metal pipe.

Do metal mounting boxes and brackets need grounding?

They may need bonding when required by local electrical codes. Test continuity to the housing and bracket, not painted surfaces.

What outdoor parts should I use for the wiring?

Use outdoor-rated junction boxes, connectors, cable entries, and suitable conduit. Protect buried cables at the required depth.

How can I test whether the grounding path works?

Use a continuity tester or low-resistance meter between the fixture terminal and grounding conductor. The reading should remain stable during gentle cable movement.

Does ground-fault protection replace grounding?

No. It provides additional protection but does not replace a proper grounding path. Test the protective device regularly.

What maintenance should an outdoor fixture receive?

Inspect cracked seals, water stains, rust, loose hardware, and hardened gaskets after severe weather. Clean the lens with a soft, damp cloth.

What should I do if the grounding connection looks unclear?

Stop working and ask a licensed electrician. A clean terminal can hide corrosion or a loose strand. Simple-looking installations can still be unsafe.

Conclusion

Grounding an outdoor LED light fixture is an essential safety step that helps protect people, equipment, and the electrical system from faults and surges. This guide explains how to ground an outdoor led light fixture by first understanding local grounding requirements and identifying the fixture’s ground wire, supply cable, and connection points. Before starting, gather suitable tools, inspect the fixture and wiring for damage, and turn off power at the circuit breaker. Confirm that the circuit is de-energized and prepare a dry, uncluttered work area.

The grounding process follows seven practical steps: identify the grounding conductors, prepare the wire ends, connect the fixture’s ground wire to the supply ground, secure the connection with an approved connector, attach the ground to the grounding terminal or metal junction box when required, protect the wiring, and carefully reassemble the fixture. After installation, restore power and test the light and grounding connection. Regularly inspect for corrosion, loose connections, moisture, or damaged insulation, and consult a qualified electrician if the wiring or grounding arrangement is unclear.

Amelia

Amelia

Amelia is a seasoned marketing professional with a wealth of expertise in our company’s core offerings. With an unwavering passion for driving growth and innovation, she plays a pivotal role in shaping our marketing strategies and enhancing brand visibility. A key aspect of her responsibilities......