Solar street lights can brighten a rural lane, a parking area, or a quiet pedestrian path without trenching a power cable to every pole. Yet the right system depends on more than brightness. Panel size, battery capacity, mounting height, weather, and nighttime operating hours all shape performance. A compact all-in-one light may suit a small walkway, while split-panel designs can help when the pole sits in shade. Hybrid systems offer another option where sunlight is inconsistent. Small choices matter.
As a practical reminder, solar-lighting specialist Elena Morris is presented here as an illustrative expert voice, not a verified interview source: “A reliable installation begins with sunlight, not the pole.” That principle guides this overview of top types and how to install solar street lights. It starts with a site check: note nearby trees, rooflines, winter shadows, and the direction of strong afternoon sun. Then compare the expected light pattern with the path people actually use. A bright spot beneath a fixture cannot compensate for dark gaps between poles.
Installation also calls for careful, grounded work. Confirm the pole base is stable, follow the manufacturer’s mounting and wiring instructions, and keep the panel clear of dirt and leaves. Test the light after dusk, then revisit its settings. Real sites can surprise you. A battery that lasts through mild weather may struggle during several cloudy days. This guide explains the main system types, practical placement decisions, and installation steps, while noting where local conditions may require a qualified installer. The aim is useful light, dependable operation, and fewer avoidable adjustments later.
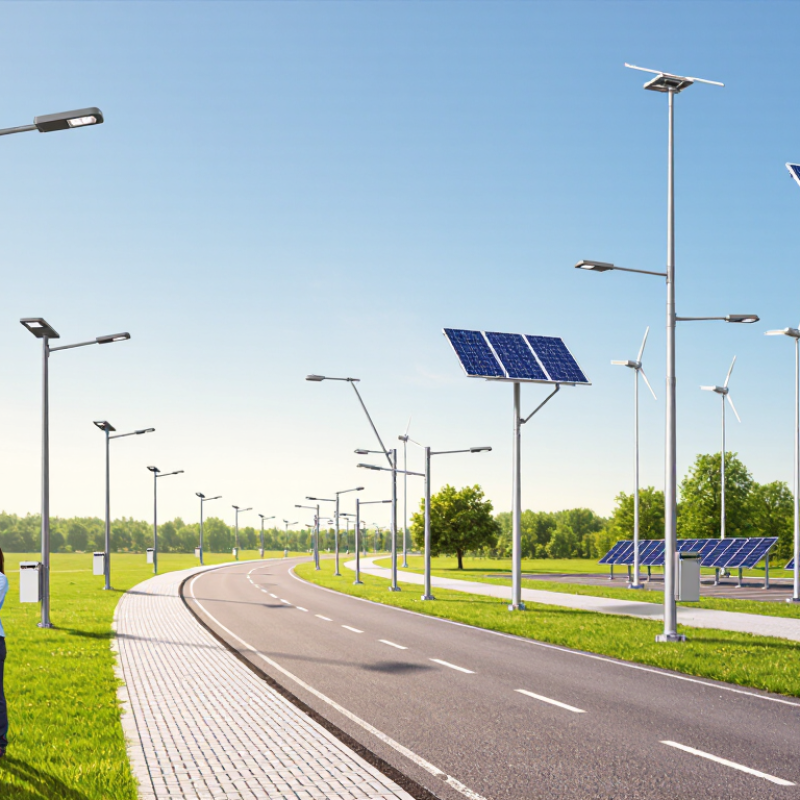
Main Types of Solar Street Lights and Their Key Features
All-in-one solar street lights place the panel, battery, controller, and LED lamp in one housing. Their compact design suits paths, small car parks, and sites where trenching is difficult. They are quick to mount. However, the fixed panel angle may not capture enough winter sun in every location, so check local sunlight and seasonal shade before choosing one.
Split-type lights use a separate solar panel connected to the lamp and battery by cables. The panel can face the sun while the light sits over the road or walkway. This gives installers more flexibility, especially where nearby trees cast shadows. It also means more wiring and secure connections to inspect. A loose cable can become a quiet failure.
Semi-integrated models combine the lamp and panel while keeping the battery in a separate compartment or pole. This can make battery access easier for maintenance, though the layout varies between designs. For any type, install the pole on a stable foundation, keep the panel clear of branches, and aim it according to the manufacturer’s guidance. Small details matter. I would still revisit the site after installation; a panel that looks clear at noon may be shaded by a building in late afternoon.
How to Choose a Suitable Solar Street Light
Choosing a solar street light starts with the place it must serve, not the largest lumen number on a product sheet. Measure the road width and pole spacing, then consider whether people need even light on sidewalks, crossings, or entrances. A narrow beam can leave dark gaps. More brightness is not always better.
Check how much direct sunlight reaches the panel during shorter winter days. Trees, nearby buildings, and rooflines can reduce charging time. Compare battery capacity and stated autonomy, meaning how long the light can operate with limited sun. Ask whether output dims overnight to conserve energy. A bigger battery may help, but it cannot fix a poorly placed panel. That detail is easy to miss.
Match the pole height and light distribution to the site, and check the fixture’s weather-resistance rating for local rain and dust. For installation, aim the panel toward the strongest available sunlight, without shade across its daily path. Follow the maker’s spacing and mounting guidance, and keep access available for cleaning and battery service. Even a careful estimate can be wrong. Observe the light after installation, then adjust its angle or schedule if the ground remains unevenly lit. Small adjustments matter.
Tools and Site Preparation for Installation
Before choosing pole positions, walk the site at morning, noon, and late afternoon. A small clinometer, compass, measuring tape, and site plan help document slope, orientation, and spacing. The World Bank and ESMAP’s Global Solar Atlas provides solar-resource maps at roughly 250-meter resolution. Use its monthly irradiation data to compare locations, then check trees and buildings in person. Maps cannot show a new roofline.
Bring a tape measure or laser distance meter, a compass, a soil probe, and a torque wrench. Mark proposed poles with stakes. Check for underground services before digging, and note drainage, vehicle access, and places where maintenance crews can safely reach batteries. Keep it simple. A phone photo from each proposed pole can reveal shadows that a neat drawing misses.
For each light, check the panel’s sun exposure across seasons, not just on installation day. Record the intended tilt and compass direction, then confirm the pole foundation suits the soil and expected wind exposure. Follow the fixture maker’s installation instructions and use appropriate fall protection and protective equipment. I have seen site plans look convincing, then fail to account for one stubborn tree. Recheck that detail before setting concrete.
Solar Street Light Types and Installation Planning
All-in-one, semi-integrated, and split solar street lights differ in how their panels, batteries, and luminaires are arranged. The chart shows indicative mounting-height ranges by site type; final pole height depends on lighting design and local requirements. Before installation, check the foundation location, soil conditions, underground utilities, and access for lifting equipment.
Step-by-Step Solar Street Light Installation
Solar street lights commonly use all-in-one fixtures or split systems with separate panels and lamps. Installation is similar, but split systems need careful panel positioning. Check the site at different times of day. Trees, walls, and roof edges can cast shadows and reduce charging.
Mark pole locations using the lighting plan, then check for buried utilities before digging. Prepare stable foundations and keep anchor bolts level and correctly spaced. Allow concrete to cure as specified before raising the pole. Use suitable lifting equipment, and keep workers clear of the suspended load. A steady base matters.
Mount the fixture securely, then position the panel toward the equator: generally south in the Northern Hemisphere and north in the Southern Hemisphere. Follow the unit’s guidance for tilt and wind exposure. Connect the battery and wiring according to the installation manual, keeping connectors dry and protected. The first layout may look tidy yet leave a dark patch, so check coverage after dusk and adjust spacing if needed. Test charging and automatic dusk-to-dawn operation before leaving the site.
Top Types of Solar Street Lights and How to Install Them - Step-by-Step Solar Street Light Installation
Common Solar Street Light Types
| Type |
Main Components |
Typical Applications |
Installation Considerations |
| All-in-one (integrated) |
LED light, solar panel, battery, and controls housed in one unit. |
Paths, small parking areas, and locations where simple installation is preferred. |
Mount the complete unit securely and position its panel where it receives ample unobstructed sunlight. |
| Semi-integrated |
LED fixture and solar panel are arranged as separate parts; the battery and controller are commonly housed in or near the fixture. |
Roads, walkways, and sites needing more flexibility in panel placement. |
Secure the panel and fixture independently as specified, and protect any exposed cable connections. |
| Split-type |
Separate solar panel, battery, controller, and LED luminaire connected by wiring. |
Larger installations or sites where components need to be positioned separately. |
Plan the cable route, use outdoor-rated enclosures and connectors, and follow the specified wiring and polarity. |
| Motion-sensor or adaptive-dimming system |
A solar street light with a sensor and controls that adjust illumination based on movement or programmed settings. |
Residential streets, paths, and areas with intermittent nighttime activity. |
Aim and configure the sensor to cover the intended area while limiting false triggers. |
Step-by-Step Solar Street Light Installation
| Step |
Task |
Key Actions and Checks |
| 1 |
Assess the site |
Check for shade, nearby obstructions, drainage, underground utilities, and the area that needs illumination. Select a location with good daytime sun exposure. |
| 2 |
Plan the layout |
Confirm pole locations, spacing, mounting height, and light distribution using the product specifications and project requirements. Avoid placing panels where trees or buildings will shade them. |
| 3 |
Prepare the foundation |
Use a foundation design appropriate for the pole, soil, and local conditions. Install anchor bolts and any required conduit according to the project drawings; allow concrete to cure as specified. |
| 4 |
Assemble the pole |
Attach the pole base and mounting hardware. Lift and secure the pole using suitable equipment and safe work practices, then check that it is upright and fasteners are tightened to the specified torque. |
| 5 |
Mount the light and panel |
Install the luminaire and solar panel using the supplied brackets. In the Northern Hemisphere, panels are generally oriented toward the south; in the Southern Hemisphere, they are generally oriented toward the north. Set tilt and direction according to site conditions and the manufacturer’s guidance. |
| 6 |
Connect the system |
For split systems, connect the panel, controller, battery, and LED unit in the order and polarity specified in the installation manual. Keep connections weather-protected and secure cables against movement. |
| 7 |
Configure and test |
Set operating hours, dimming levels, or motion-sensor settings where available. Check charging status and verify that the light switches on and responds as intended after dark or using the specified test method. |
| 8 |
Inspect and maintain |
Recheck pole stability, fasteners, panel cleanliness, and cable or enclosure condition periodically. Follow the product manual for battery checks and other maintenance. |
Note: Foundation dimensions, pole height, spacing, wiring, and settings depend on the product, site conditions, and local requirements. Follow the manufacturer’s instructions and applicable electrical and construction codes.
System Testing and Routine Maintenance
After installation, inspect the pole, panel, and fixture for secure mounting before powering the system. Check wiring polarity and connector seals against the manufacturer’s instructions. A loose connection can cause flickering or prevent charging. Small details matter.
Test the light after dusk, or use the controller’s test mode if available. Confirm that the fixture turns on at the expected time and stays lit through its programmed cycle. For motion-activated models, walk through the detection area at different distances. Note any dark patches, delayed responses, or unexpected shutoffs. Record the readings.
Routine maintenance should include checking the panel for dust, leaves, or bird droppings. Clean it with a soft cloth and water when needed; abrasive tools can scratch its surface. Inspect cables for cracked insulation and look for corrosion around terminals. Check that bolts remain tight after strong winds. Battery performance can decline gradually, so compare runtime with earlier records rather than relying on one night. A fixed cleaning schedule may be excessive in a clean location, while dusty sites need closer attention. Review the pattern and adjust.
Conclusion
Solar street lights come in several types, including all-in-one models with integrated components, split systems with separate panels and batteries, and hybrid designs that can use an additional power source. Each offers different benefits in energy storage, installation flexibility, and maintenance needs. Choosing a suitable light involves considering the area’s sunlight, required brightness, lighting hours, pole height, weather conditions, and available budget.
A successful installation begins with checking the site, confirming that the ground and pole can support the equipment, and gathering the necessary tools and safety gear. To understand how to install solar street lights, follow the product’s instructions: position the panel for strong sun exposure, secure the pole and fixtures, connect the components correctly, and set the lighting controls. After installation, test the system at night and check its operation. Routine cleaning, connection inspections, and battery checks help maintain reliable performance over time.

 Habel Lighting